Well anyways. So because of that. My projects have been put on hold. Luckily, I was doing a lot of stuff before so I'm able to dig into my ol' archives :) So this next project is old to me...but new to you! You may have seen it in some of my bedroom pictures. Now I'm going to tell you how to make it :)
First off, can I just tell you how amazed I am that that orchid is still alive??? I have the Worst. and I mean. W.O.R.S.T. green thumb ever. It's really a black thumb of death. I can't keep anything alive. I will follow every single instruction and without fail, a few days later or so, the plant/flower always dies. Well I think this orchid may be plastic or something cuz it's been like 3 months and still going strong. Not a single pedal has fallen off.
Okay. So to get from wood pieces to beautiful table, here's the supplies you'll need:
Two 1x2s
Two 1x3s
One 1x4s
One 1x9 board
Wood filler
Wood Glue
Saw
Drill/screws/counter sink bit
Stain
Polyurethane
Step 1. Take one 1x3 and one 1x2 piece. Stack the 1x2 on top of the 1x3 edges meeting so that it creates a 90 degree angle. Secure this in place with the wood glue.
Step 2. Do this to all the pieces. You should have 4 'legs' once you're done. Let them dry and then counter sink 1 inch or 3/4 inch screws into the top and bottom of each piece to make sure its secure. Fill holes with wood filler.
Step 3. Lay two legs down facing each other, 1x3 piece on the ground. Place a 1x4 cut at 23 inches on the top of each one. Secure each leg to the end of the 1x4 using a 3/4 screw. Do this with the other two legs and other 1x4. Make sure the edges are flush.
Step 4. On one set of legs. Use two 1x4s cut at 5 1/2 inches and secure to the 1x2 part of the leg on the top, right next to the long 1x4 you just secured. Then secure a piece of a 1x3 cut at 7 inches on the bottom of each leg equidistant. I put min about 5 inches above the bottom. Now mark the middle of each 1x3. Cut another 1x3 at 21.5 inches.
Make sure the flat 3 inch side is flush with the 1 inch side of the other 1x3. Then counter sink a 1 inch screw to secure. Do this to the other side.
Next you just need to secure the top! Make sure you measure so that its centered on the table base. My 1x9 is cut at 40 inches. Counter sink a screw on the top into the base. I did that four times to make sure it was really on there.
Now fill all the holes with wood filler then sand. Now you are ready to paint or stain!
I used dark walnut for my stain. Once the stain was dry I put two layers of polyurethane on the top.
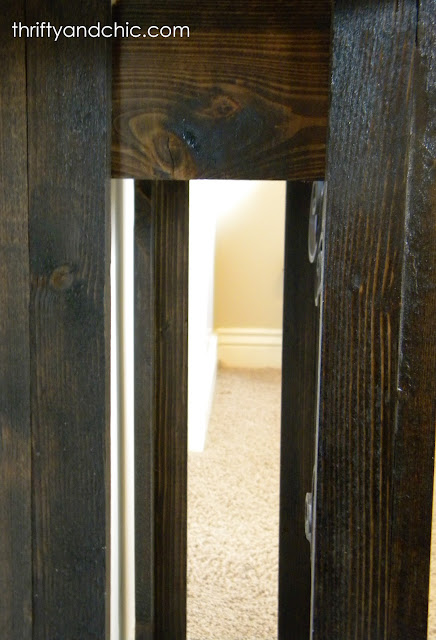
Here's the view of how the 1x2 meets the 1x3 on the legs. There's a small seam, but not too bad. But definitely something you would want from the sides and not the front, thats why its important to make sure the 1x3 is on the ground in the 3rd step above. I made the mistake once of not paying attention and I had one leg with a seam on the front and the other not. It looked a little funny :)
To finish this off, I decided to add a little iron work onto the front. I got this at Hobby Lobby. I can't remember how much, but it wasn't over $10. I just screwed the top into the bottom of the 1x4.
This table came in just under $20. Would have been half the price if it wasn't for the iron decor :) Plus it helps when you have the stain and poly on hand.
The best thing about this, is that you can make it any size you want. If you want it taller, just change the size of your 1x2 and 1x3. If you want it deeper, just change the size of the end 1x4 and 1x3s and of course, the size of the top piece. You can even use particle board or thicker lumber for the top. You can design this to whatever specification you may need :) I redesigned this into a bench. You can see it here. And I designed this to be a little taller and added some molding and paint to it in this project. See? easy to change up however you want :) Have fun with it!


Oh so perfect! I love this, great job!!
ReplyDeleteI really love the iron detail. Very Nice!!
ReplyDeleteIt's so simple but really pretty and I love the addition of the iron piece!
ReplyDeleteVery nice! Love the added ironwork. Visiting from Tatertots and Jello.
ReplyDeleteMary @ athomeonthebay.com
Love this table! Awesome tutorial as well! Your blog is beautiful and I can't wait to check the rest of it out.
ReplyDeleteHave a happy, happy weekend!
♥Tausha
sassystyleredesign.com
This is too cool, i love it! I'm tucking this idea in the back of my mind for a future project.I haven't gotten that far in crafting yet!
ReplyDeleteLOVE this and the iron piece is the icing on the cake! I would love for you to share it over at our Friday Block Party at Curb Alert! The link is open all weekend.
ReplyDeletehttp://tamicurbalert.blogspot.com/2012/05/friday-block-party-5-feature-from-party.html
Thanks, Tami @ Curb Alert!
Great tutorial! I swear you are like handiest gal I "know" with power tools.
ReplyDeleteJust made this table over the weekend, my first project ever actually!! Thanks for the awesome tutorial. I made the bottom 1×3 a little wider (1×6?) To use as a second shelf…CRAZY I know but the heart wants what it wants :)
ReplyDelete