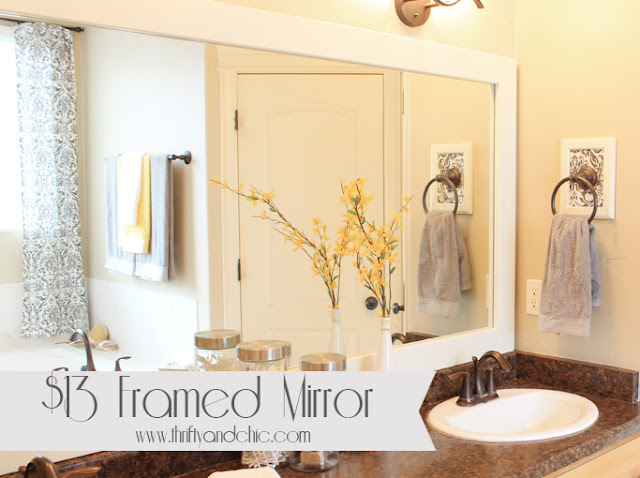
Then I realized that I didn't like all the fancy molding more than I liked just plain boards :) So why not just do plain boards?? At under 70 cents a foot, it's a good deal. Especially when I had 19 feet to go with. I decided to buy some 1x6 mdf that you can find right by the molding. I love it because it's so thick and substantial. My mirror measured at 74"x37". You can buy these by different lengths, so I just bought 2 of the ten footers. Home Depot and Lowes both have places where you can cut the molding, so if you have your measurements, you can cut them there. They even have a miter box if you want to do your miter cuts there too :)
Here's how you do it: So, first paint the molding. These ones were already white, but it's just primed, so I just gave them a couple coats of some top coat.
For the back, paint about a quarter of the side that would be in the inside of the mirror since you'll be able to see it's reflection just a bit when its finally on the mirror. The painted side will be your shorter side once you miter cut it.
Once all the paint is dry, send it through your miter box or miter saw at a 45 degree angle for each side. Making sure, once again, that the painting backside edge is the shorter edge. Your cuts should be the same on each board and one side should be a cut at this angle \ and the other should be a cut at this angle /. So your board should look like this \________/ but with a top edge :) and that bottom edge is your painted backside edge.
Now with the boards cut and ready to go, take some waterproof silicone and run some along the none painted part of the backside of each piece.
Place the bottom piece first, secure with some painters tape.
Then the side pieces next.
And then the top piece. The best way to make sure these are all aligned and straight is to follow the outside edge of the mirror itself. The outside edge of the molding should be flush with the edge of the mirror.
This dries pretty quickly, but I usually won't take off the tape for a couple of hours or so.
For the edges, if you cut your cuts perfect, you shouldn't have to fill them in, all you need to do is maybe take a quick paint brush to it. But if the edges aren't perfect, just get some wood filler, fill in the gap, dry, sand, and paint.
I can't believe the difference this made in my bathroom. (don't mind the lovely hardwater stains all over the counter and faucet :) ). On that note, I'm thinking I would love some nice new shiny silver/chrome faucets and maybe not so dark of countertops :)
It is so much brighter in here now. And it finally feels finished. I've been living in a complete non-decorated space for 4 years now. You would think that this would be the first bathroom I would 'freshen' up but it's the last :( I guess it's just so daunting. And it gets dirty really quick so maybe I think it's all for not. But....maybe...just maybe...with it all decorated now, it'll stay clean :)
So, here's the before of the bathroom mirror. Long..very long...and boring :) And the counter...well I won't get into the counter mess lol
I can't get over how nice and bright it is in here now, especially with the new blinds and curtains. It was always so so dismal in here before. You have no idea. It was gross too :) I never used the bathtub, so that just got dirty way to quick, full of dust and grimy dust. The worst kind :)
This is with the lights off and blinds open just a bit. Heaven :)
I can't wait to get ready in here now :) Before, it was like...in and out. Get your business done and leave. lol
It's amazing what little changes can do. So the total cost of this mirror project? Just under $13. :) It would be super cheap if your mirror was a fraction of this size, once again, this is over six feet long.
This posted is sponsored by:

(click to go out check out there inventory! Really beautiful stuff )


love this tutorial :) Where did you get you clear containers? Love your bathroom too :)
ReplyDeleteI don't know where she got hers, but I have the exact same ones and I got them at Hobby Lobby.
DeleteAlicia your mirror looks amazing! I have two of these plain builder-special's in our bathrooms and they would look so much better with a clean white frame. Great idea!
ReplyDeletexo, Tanya
I want to do this SO bad in my bathroom. My mirror it sitting in a track that is glued to the top of the backsplash and there are clips on top of the mirror. This is making it almost impossible. :(
ReplyDeleteAlicia, thank you for the very clear step by steps! As a first time DIYer I need all the help I can get. :). I have clear clips screwed into the walls holding the builders mirrors in place. Did you have these as well? How do you work the wood around them?
ReplyDelete