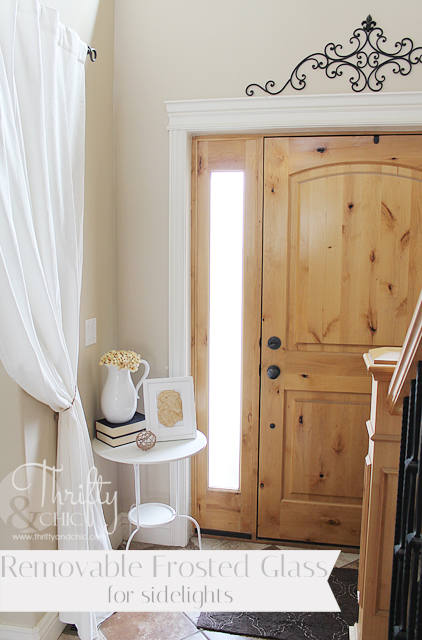
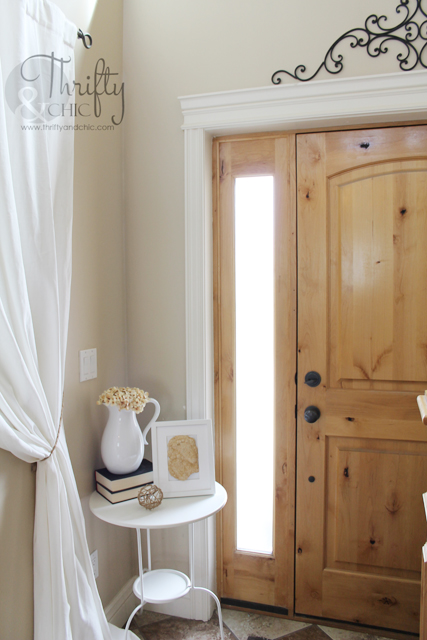
I love my house, but there is one thing I would change about it...(well, two if you include adding closets and storage space)...the sidelights. I'm a fan of bringing in more light into the house yadda yadda yadda....but, the placement of the door and the sidelights are really dumb. Well, the placement of the door make sense, but the addition of the sidelights was dumb. If someone is knocking at the door, they can easily see right into our hallway down into the living room. It's annoying when you don't want to answer the door and they see you sitting there watching TV, know what I mean? And trust me, those 'no solicitor' signs don't do jack squat around my neighborhood.
I usually just hid the sidelights with some big shrubs flanking the door, or door fringe type stuff. Well, I'm not one to really do any of that during the spring and summer, so for half the year, I had pesky looky lous :)
I priced out doing blinds...way to expensive. I attempted to do curtains...just looked weird. So....for the past 8 months I have been using paper towels. Yes. Now you know my dirty little secret :) It worked great! A: It was removable. B: It let in the perfect amount of light. C: It was cheap. D: I could use the paper towels to wash the windows once I took them down. See, so the question is...why NOT use paper towels???
I didn't care or mind until a little neighbor kid was hanging outside with us and wanted to see Max. So he went to door and started trying to look into the sidelights to see him. Well, he promptly noticed that our window coverings were paper towels. "Why do you have paper towels on your windows?" Imagine this in a wonderful little accusing 8 year old boy voice :) lol. I didn't care about it too much...and then his mom came to pick them up. "Mom! She has paper towels as her window coverings!"
I'm an adult, I'm past elementary school, so why do I care so much about what this little boy thinks???
Well, I figured it was time to change it. I'm sure a lot more people wondered the same thing, it just brought a little boy with no censor to say something about it. I've been wanting to do frosted glass for a while, but didn't want to actually etch the glass.
I've been looking for frosted contact paper for forever for this project, but have yet to find any. Well, I found some, but the pattern reminded me of something from Save By The Bell...very geometric and 80s looking. So, I found some film over at Home Depot for $25 a roll with a really pretty motif. Once I realized it wouldn't line up and I would have to get 2 rolls to make this work, I scratched the idea. Then I started looking for the frosted contact paper again. I thought that maybe they would have some now that the school supplies were out. Like remember the nice pink and green contact paper to cover your books??? I loved that stuff. And I knew it came in frosted clear too. Well, I couldn't find any of it. I found plenty of clear contact paper in the drawer lining aisle, but wasn't sure if clear would work. Then I finally got annoyed with looking and figured I might as well see what clear will do. (this was like a 5 month process mind you :)...that means lots of searching for this non-existent stuff).
I cut a piece of the clear contact paper, put it on my window...and voila! Frosted. Figures. It wasn't until after this that I found a blog saying that clear looks like frosted. I wish I was smart and looked on the internet months and months ago lol. I'm sure my husband would have appreciated it too :) Anyway. You live you learn. At least I figured it out.
On to removing my beautiful window covers and putting up the frosted glass.
First step was to clean the window with Windex... of course using the paper towels too...reduce, reuse recycle :)
I measured the size of the window and matched it to the lines on the back of the contact paper and started cutting.
I cut it the length of the window but then left it attached to the rest of the roll. I learned my lesson from the first sidelight that if you mess up on the top and take it off, it looks like crap. So it would be great to cut off that top crappy piece and just lengthen the amount at the bottom...that's why you keep it on the roll so you can do that :) Make sense? You know, just in case you mess up you don't have a huge crappy spot somewhere or a line going right through the middle or your window where you had to start a new piece...unless that's your style, then go for it.
Okay. Now to put it on the window. I started from the top, took off the backing about a couple inches down and line up the top and sides to the window.
I then got a card (yes, my costa vida card :) ....reminded me of how hungry I was every single time I looked at it lol) and rubbed it against the contact paper on the window in a downward direction. I noticed going down and not sideways made a big difference with the way it looked.
If you go sideways, there's a potential for getting a crease. Just go down, move the bubbles down where you are pulling the backing off and it should turn out pretty good :)
Keep doing this down the whole window, pulling of the backing every couple of inches. Don't pull it off all at once, you'll get yourself into a heap of trouble and annoyance.
Then cut at the bottom when it's all done.
I can't tell you how much better this is lol. I mean, compare this to paper towels and you'll totally understand :) It lets in the light, but skews everything else. You can only make out light sources when looking through it, even at night. It's the most wonderful thing in the world.
I was tempted to do all my windows with this and then realized that would be a little excessive and completely unnecessary.
The roll only cost me $5. I was able to do two huge sidelights and have plenty left over....maybe I should go cover some of my books now ....just kidding ;)
I'll try to upload a night time picture if I ever remember to take one :)
Subscribe to:
Post Comments (Atom)


Looks great! They really need to take Clear off the label - I too thought it was crystal clear, like the stuff I used to cover my textbooks back in the day, which definitely was not frosted!
ReplyDeleteSo glad you found a solution! For those of us with electronic cutting machines (Silhouette or Cricut) this stuff works great as transfer tape too and is so much cheaper!
ReplyDeleteCheck out Wallpaper For Windows decorative & privacy films. They are static-cling (no adhesive) and so easy to apply, and remove if you want to change designs. There are so many designs to choose from, etched glass, stained glass, privacy and see-through
ReplyDeleteversions. They also have a trim to size service you order the size sheet large enough for the glass your covering, and they will trim it down to your measurements. It's so worth it, especially for french pane windows or doors. We have several throughout our home and just love them!! www.wallpaperforwindows.com
Thank you for sharing this link. At long last I've found the solution I needed!
DeleteAwesome. I should try this in our bathroom.....
ReplyDeleteI was thinking the same thing.
DeleteYou are a smart one! Thanks for the ingenious idea!
ReplyDeleteI've been looking to do the same thing with my front door, so your tutorial is The Best Thing I've Found Online Today. :)
ReplyDeleteI did this to the little windows on my front door 2 months ago and I'm so happy with it! I did spray some water on the window before placing the contact paper on - it made it a bit easier for placement (in case I need to reposition it). It's a bit messy, but was worth it. Glad you were able to figure out that it was the clear contact paper and not "frosted". lol
ReplyDeletehttp://adventuresindiy1759.blogspot.com/2013/08/diy-privacy-window-vinyl.html
Can you see out enough to tell if it's a child or adult at the door? I want to cover the arched window in our door but at the same time, I want to see who is out there before I open the door. Thanks!
ReplyDeleteYou can tell by the shadow height. You can't see the person at all, just a shadowy figure.
DeleteThis is a great solution! Thank you so much for sharing!
ReplyDeleteI'm so excited to find this! I thought I was going to have to spend hundreds of dollars to cover my sidelights but hoped I might find a creative solution. Thank you for sharing this great idea!
ReplyDeleteCan you remove it if you get tired of it?
ReplyDelete