This post is in collaboration with 3M DIY Starts here. Though I have been compensated for the product and the review, the content and material below are 100% mine.
So, I jumped on the opportunity to test out 3M™'s Window Insulator Kit. I first wanted to try it in the nursery since it gets pretty cold in there at night, and the monitor shows the temp in there so I actually had a way to gauge if it helped or not.
The packaging is pretty basic. Upon opening it, it made me kind of thrilled that there weren't any additional instruction sheets...the only instructions you needed were the 4 steps on the outside of the box. How easy can that be? As for the contents, there was tape and plastic wrap looking stuff, not much to it.
First was to measure the window and then cut the plastic wrap 1 inch bigger around each edge...so adding an additional 2 inches in width and length.
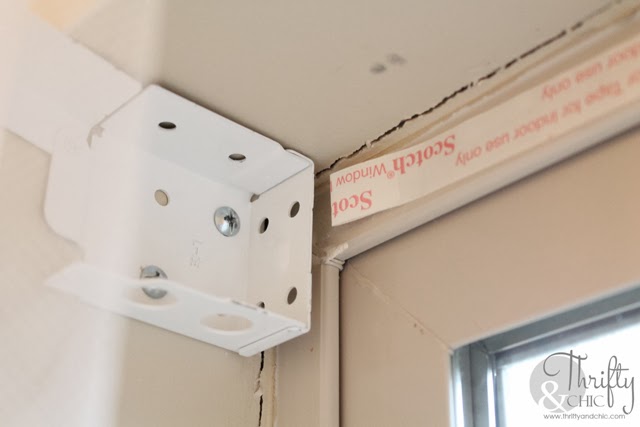
Once I got the plastic cut, I then placed the tape around the edges of the window frame.
This was pretty easy besides working around the blinds. I had to take off the blinds and then kind of stick the tape behind the hardware. It was easier starting the tape off a little without the backing and securing it behind the hardware and then securing the rest of the tape around the window then taking off the rest of the backing.
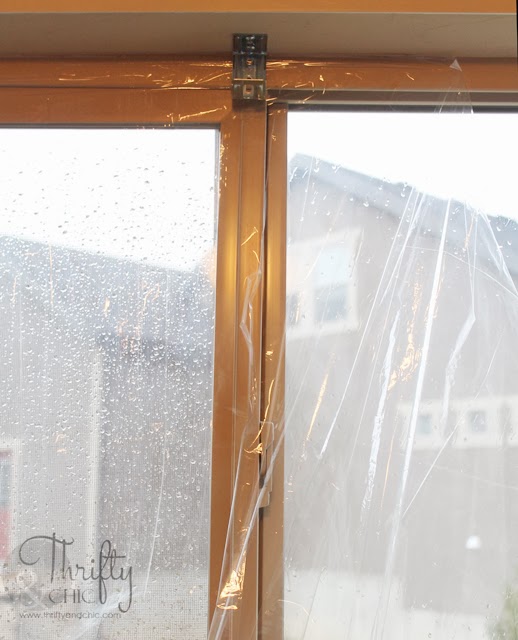
I then started from the top middle and placed the plastic on the tape.
And then I pulled and secured it to the sides. Lastly, the bottom.
It needs to be pretty tight, so luckily it's pretty easy to take off the plastic from the tape and pull it taught. The goal is to not have any wrinkles; which I thought was ridiculous because that was half near impossible. So I kept pulling and securing, pulling and securing. But kept getting wrinkles.
But the last step is to use a blow dryer to get rid of any stubborn wrinkles. I started to blow dry it, but it didn't do much. I then decided to move the blow dryer closer than I thought was safe... I thought it would burn through the plastic. But whatdoyaknow. It worked awesome! So, pretty much the bottom line, blow dry it closer than you think you should and it will work...the wrinkles will seriously vanish!
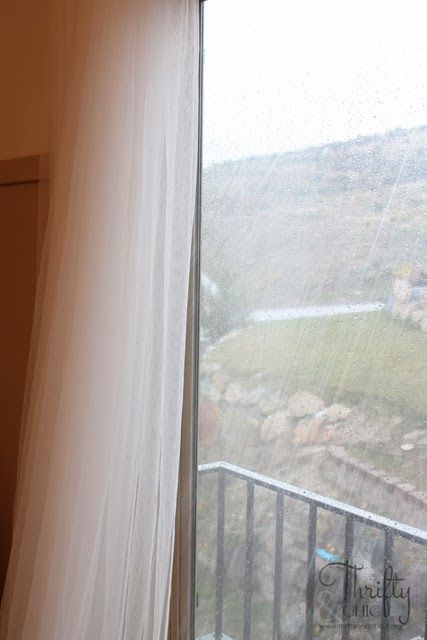
This maybe took about 10 minutes to do this window, if that. The hardest thing to do was getting the blinds off and on. The best part about this is that you can't even tell its on there :) ...and withstands baby abuse...
After having it on the past few weeks, I have noticed on average that the temperature is about 2 degrees warmer, which makes a big difference to me. I like looking at the temp saying that it's 70 degrees instead of 68 degrees. Sometimes it was even dipping to about 64 degrees and I haven't see that temp since I put up the window insulation. Which makes this momma happy :)
I was worried about the removal of this also..you are suppose to take it off after the winter season. I didn't know if the tape would stay on or come off. But it came off pretty easily when I tried to take it off; of course that was shortly after it was up...so we'll see how it does in a few months when it has had time to adhere to the window more. Over all, I would definitely use the3M™ Window Insulator Kits...now let's hope for some energy savings! :)...goodness knows our energy rates are sky high so anything will help.
To check out some other great projects 3M DIY has to offer, visit their social media pages:
3M DIY Twitter Page
3M DIY Facebook Page
3M DIY Pinterest Page
3MDIY.com I'm required to disclose a relationship between our site and 3M DIY Starts Here. This could include the 3M DIY Starts Here providing us w/content, product, access or other forms of payment.


 I first wanted to try it in the nursery since it gets pretty cold in there at night, and the monitor shows the temp in there so I actually had a way to gauge if it helped or not.


 I'm required to disclose a relationship between our site and 3M DIY Starts Here. This could include the 3M DIY Starts Here providing us w/content, product, access or other forms of payment.
Coolness! My husband said he wants to get some of this and I refused, thinking the plastic would be all bunchy and obvious from the street. But you just talked me into it. We NEED something, especially upstairs in the summer, and in the downstairs baby's room on the north side of the house in the winter. This old house does NOT maintain its temp!
ReplyDeleteI know! I was totally skeptical about using it first. I didn't think it would look good, but really, the only thing you see is the inch or so of plastic wrap that hangs over the edge...which I'm sure you can cut off if it really bugged you that much :)
DeleteHmmm, this just might be worth a try. Anything to cut down on heating and cooling costs is a win for sure.
ReplyDeleteI use this every year, and it really makes a difference in the comfort level of the home. Since my windows aren't terribly old (at least they don't look terribly old), I thought they'd be fine without the plastic. Little did I know, the wind blows right in. Putting the plastic up added a level of comfort--and kept the cold air from blowing in. I have never had a problem with removal at the end of the season.
ReplyDeleteThat is good to know about not having a problem removing them! My windows are only 5 years old and double pane and I still have a problem with the wind and noise :( I hope this really work this winter!
DeleteIts that time of year again! I love that there is no more air conditioning and no more unbearable heat. I do this to all my upstairs windows every year. Keeps all the cold air from coming into the bedrooms at night.
ReplyDeleteAt the other house, we used this stuff all the time and yes, it warmed the room alot!! If you have a back door, make yourself a snake for the bottom to keep the cold out (you know - long round stuffed thing weighed down with sand or pebbles - it kept the cold and snow out. When we bought this house, it's so small (but open) that we put one heater on and it heats the whole place (heated by electricity) However, if you open the door, it also freezes the place!! The stuff comes off easily too - if some gets stuck, you can use the hair dryer to unstick it!! :)
ReplyDeleteThank you for the advice! I think I need to just add some new weather stripping to my backdoor, the wind and air that comes through there is ridiculous.
DeleteI had a very good experience with one company when my AC unit broke down. I called at around 2 p.m., and the repair guy came at 2:20 p.m. I thought my watch wasn’t working well. But he was really that fast to come fix my AC. Up to now, while enjoying the sweet, cold air in my bedroom, I think about how reliable that repair guy is. Good thing too, because that happened during the summer. If it wasn’t for him, I would have been dying because of the heat
ReplyDeleteThanks for the really nice info. I was also totally skeptical using such window insulation kit but it really works well for my youngest one room. As a Furnace Service Abbotsford contractor, I always recommends my customers using kits to keep room cool or warn in both season.
ReplyDelete