So, this year, I decided that I needed different stockings again...of course :) Cuz, what would any Christmas in my house be without different stockings? Truthfully, at first, I really didn't want to make the stockings. Not that I didn't want to....I was just too lazy too :) And well, I thought that it would be pretty easy to find cable knit, or sweater type, stockings somewhere for a reasonable prize. I scoured everywhere for them. Nothing came up, cheapest I found was $15 per stocking and with 4 stockings I didn't want to pay that much.
So, instead I went to the thrift store and grabbed two sweaters, both for $4. I went to the men's section first because those are bigger sweaters and you can get more stockings out of them in turn. But there weren't any cable knit. So, I went to the woman's and found a cute white cable knit sweater. I figured I would figure it out when I got home.
I was able to do 4 stockings out of the men's sweater, and well, only one out of the woman's since it was a zip up, it took precious space on the front :(
Here are the steps to make the stockings from sweaters:
First, grab an existing stocking that you like the size of. Trace it onto the inside of your sweater. If you want it to be longer, add some height or wider, add some width etc. When tracing mine out, I added some seam allowance of about an inch around the whole stocking. And for the top, since I was going to fold these over, I also added and extra 4 inches or so (not shown in the picture)
Make sure to line up the top with the bottom already finished portion of the sweater. This will give that cute fold once you are done :)
Now cut out the sweater.
Use the piece of sweater you just cut out to trace onto a piece of fabric you want to use for the back. I just used some linen but you can spice this up by using a really cute print too :)
For this piece, on the top make sure you trace about an inch longer than the sweater.
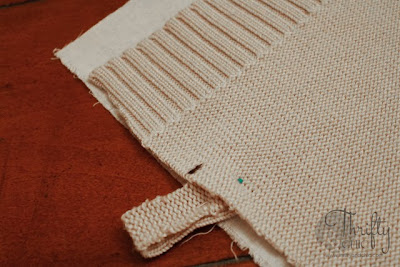
Pin your sweater to the fabric. Make sure it's outside in. Mark about 3 or 4 inches down on each side.
Now get a piece of fabric about 6 inches long...or ribbon, fold it in half and stick it right underneath the mark that's on the side of the heal. Pin place so the fold is on the outside.
Start sewing around the stocking starting at one mark and ending at the other.
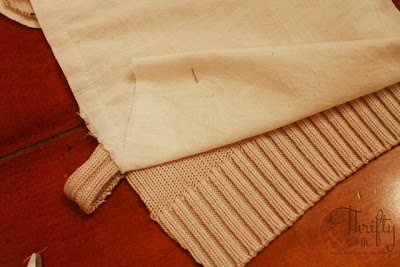
Now, take that extra 1 inch that you traced out of the fabric; fold it and pin it towards the outside so the top if it is now inline with the top of the sweater.
Stitch the fabric.
Now, turn the stocking outside out and pin and stitch the upper portion that isn't already stitched together...your 4 or so inches you left unstitched in one of the steps above.
Now fold that same portion over, and there you go! You have a cute little stocking :)
Things to remember when making additional stockings, make sure you always trace the same way every time :) Trust me, you don't want one stocking that goes to the left and one that goes to the right. Or maybe you do...if so, by all means then :)
So, instead of spending $60 on 4 stockings, I spent $8 on five. Not bad. Plus, I love how these hang. The hubs says they look too much like real stockings...I think that's the point and why I like them so much :)
Have a very Merry Christmas!


Great idea :)
ReplyDeleteMerry Christmas!
Hello,
ReplyDeleteSeriously, this is my favourite blog ever. I am in it for the last two days or so - and I'm in love with everything you made so far. Can you please please tell me the color of the walls (in living room - white/beige or what?). Thanks