You ever have one of those projects that you think up in your head for awhile, never do them, then finally do them and they gave you the worst anxiety and then you wished you never started? haha. Well, this was one of those projects for me! You'll see why below. But, the end result turned out beautiful and better than I had planned, so it was all worth it in the end :)
Last year when I decided to turn my office/guest room into the nursery, I had to find a place for everything that used to me in there. I moved most of it into our basement with high hopes of actually using it, and well, that never happened. So, the stuff that I do use often enough had to find a place in our main living areas. Everything found a spot luckily, besides my printer. I had no idea where to put it. It just traveled from my dining room floor to my bedroom when guests came over, back to the dining room floor. It was a complete eyesore and I desperately needed to find a place for it. I had a vision of making a cute little storage cabinet for it and putting it under the bookshelf in my living room for months, but never got around to doing it. Well, I finally decided to make it after all these months :)
This thing failed on so many levels for me. I attribute it to mommy brain haha. First off, I drew my sketch, which I totally miscalculated the amount of wood I needed. That was a big pain in the butt, since I live like 20 minutes from the closest Home Depot. Next, I put it all together, and tried to put it in the shelf, and it didn't fit! I measured, measured like 3 times even, but didn't account for the way I was going to make it, adding an extra 1 1/2 inches to the height. And there was the problem with the plug, I had no idea I had something already plugged in it that joilted the entire cabinet out by like 2 inches. Ugh.
Long story short. This took me 3 days to make, and a lot of lessons learned :) But, because of it, I have two tutorials to go through on how I made it...and then remade it! Both ways turned out great in the end, one just fit better than the other :) Hopefully that doesn't scare any of you from making it! I did the mess ups so you hopefully you won't have too!
My original measurements were 23.5 inches deep by 24 inches wide and 14 inches high. This first tutorial will show you how to make it 23.5 inches deep by 24 inches wide and 16.5 inches high.
First step is to get 2 panels of 4 1x4s cut at 21 inches, 2 1x2s cut at 14 inches (per panel).
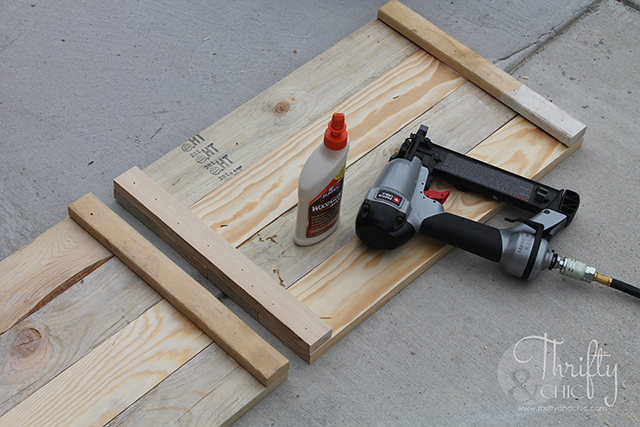
Secure the 1x2s to the ends of the 1x4s with wood glue and a nail gun. You can also do screws here if you wish.
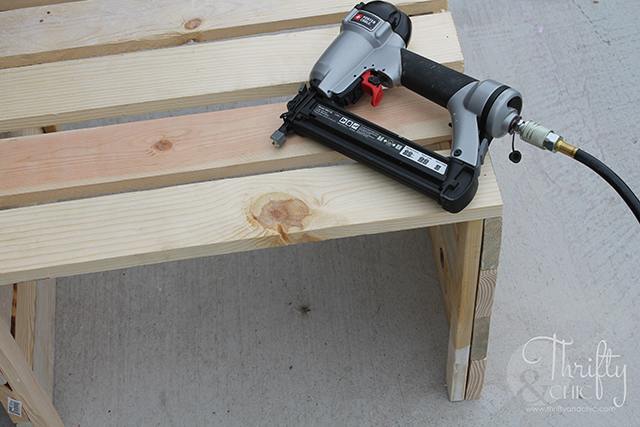
Next is to build the three sides of the box, leaving one side open for where you will have the door. These slats measure 24 inches each. Secure them to the sides in the first step with glue and a nail gun.
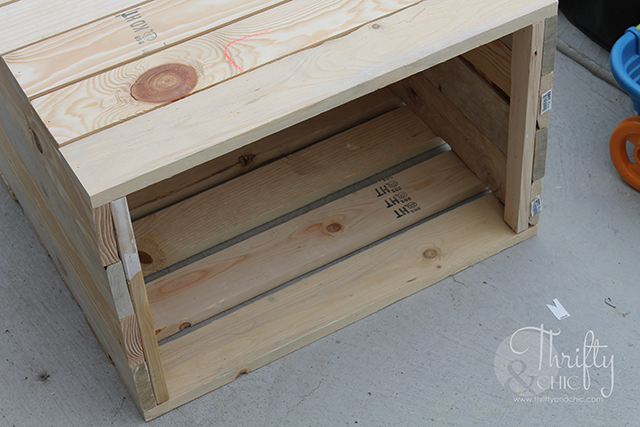
Here's how the finished box looked for me without the door on it. The top and bottom were a little more gappy than the sides...the bottom more so because I needed one more panel and ran out of wood! So, I gapped that a lot since it wasn't going to be shown really anyway.
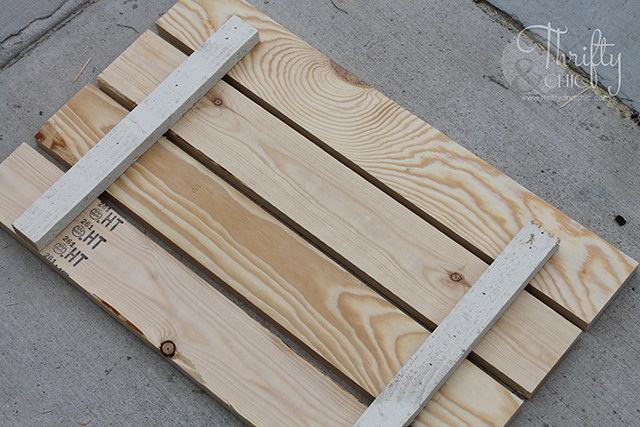
For the door, I used 4 1x4s at 24 inches and measure the opening, then spaced out the wood accordingly. I then cut 2 1x2s a little shorter on one end, securing them to the 1x4s. The bottoms of the 1x2s sat flush on the bottom with the bottom 1x4, leaving about an inch on top.
I don't have this pictured, sorry, but then I got hinges and connected them to the bottom of this door (one where the writing in the picture is above, and then the other on the other side by the next 1x2). I then attached the hinge to the inside bottom of the box. You can kind of see below how it ended up looking when it was open.
Next I sanded it and painted it.
I then got some hardware and spray painted it black.
I then secured some of the hardware onto the box. This is how the box looked at this stage. You can see how all the 1x4s are laying on top of the box. I actually didn't mind this box, I just wish it had fit!
It was a little gappy on the front, but I think it added character.
But, since it was just too tall, I had to take some drastic measures.....
I ended up ripping practically the whole thing apart! I probably should have taken some more pictures in this process, but truthfully, I thought it was going to end up looking horrific, so I didn't. But in reality, it looks better than before in my opinion. So, here's what I changed. I took the top and bottoms 1x4s off. I then took my jigsaw and cut the attached 1x2s on the side panels down by 1 inch on top and bottom. I cut the 1x4s that I had taken off to 22 inches long. I then secured them inside the side panels, as seen below:
I just used my nail gun and secured them from the outside. The top hardware piece is purely decoration. I did this on the top, then started on the bottom, then decided I don't care about the bottom and only put one on there for structure to hold the door.
As for the door, I took that apart also. I put them all together with no gaps to make them the same size as the sides, 14 inches tall. I then cut the 1x2s down to about 12 inches each and secured them onto the 1x4s, leaving about 1 inch on top and bottom (you can see what I mean in the picture of the open door a few pictures down).
For the hinge, it now had to be secured on the underside of the bottom 1x4 to work.
And then my box was complete, again! :)
I had already distressed the edges using my sander and some Dark Walnut stain from Minwax.
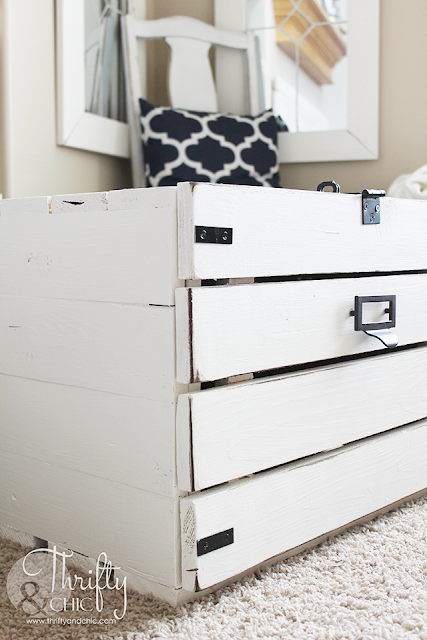
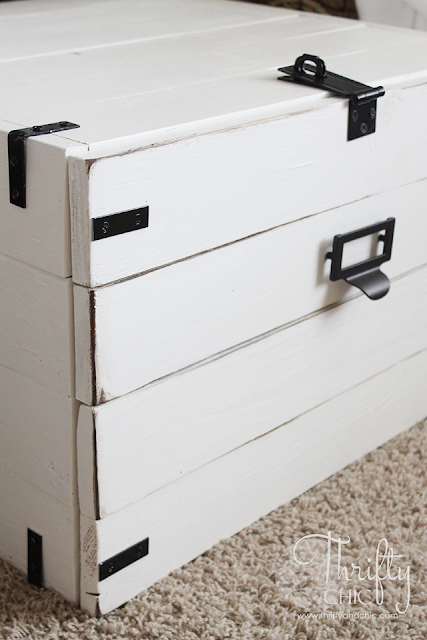
I then added all the hardware. I found this door clasp at Ace and the decorative pull from Home Depot.
I really am so happy at how this door turned out. It's really the only part you can see when it's in the shelf, and it looks great!
It's quite the heavy/large box too. There's a lot of wood that went into it. Here it is closed.
And open with the printer inside. I could have added a shelf for paper, but I wanted to be able to open the printer and not have to take it out of the box.
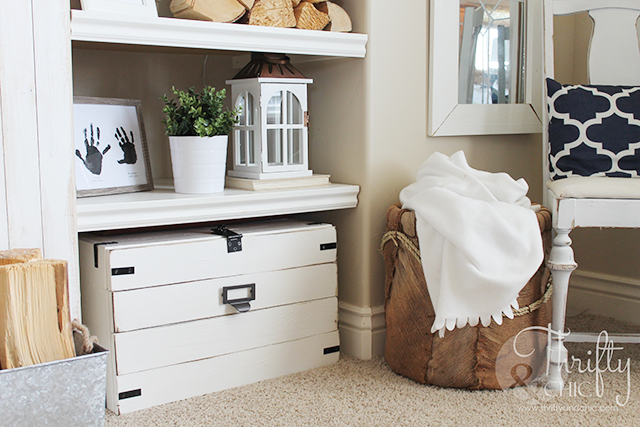
Here it is inside the little alcove under the shelves. I am so happy about this, you have no idea! It looks awesome here and got rid of the eyesore on the floor in my dining room lol.
Oh, and for the plug? Well, it just so happened that when I shorted it, the plug that joilted out so far sat right above the box :)
And to have access to the outlet for the printer, I just took out a slat on the top:
This worked out great and I'm so glad it finally did after a lot of grief and anxiety lol. If you all want a better tutorial with pictures on the finished box, let me know and I'll try to recreate it :)









Genius. It looks amazing.
ReplyDeleteThank you Marty!
DeleteI love it! Another great project, and so inspiring.
ReplyDeleteI love how this looks! It's so cute in that space and the hardware is a really nice touch :)
ReplyDeleteIt looks like you have enough room that you could add a box to hold paper on the inside of the door. Just an idea. :-)
ReplyDeleteIt looks like you have enough room that you could add a box to hold paper on the inside of the door. Just an idea. :-)
ReplyDeleteThis is a great idea to make a storage box to hide a big printer. Thank you for storage box tutorial and this box can be used to hide printer and to flaunt it as a decor item. Your box is looking fab in white paint and complementing room as well. Suh a new idea!
ReplyDeleteI would definitely use this box for stowing away things for sure. It looks like it might go quite well with my décor. But storage for a printer seems a little counter intuitive since it looks like it'll be a bit hard to access the printer when you need it. Also considering how often printers need troubleshooting... I would advise against a closed container for such appliances!
ReplyDeleteThis looks amazing and i love your wall paint color? we are in process of getting house painted. can i ask what paint color is in your wallz. its so beautiful!
ReplyDeleteThis looks amazing and i love your wall paint color? we are in process of getting house painted. can i ask what paint color is in your wallz. its so beautiful!
ReplyDeleteLooks great.
ReplyDeleteIm going to try it myself but use runners so i can pull the printer out.
Can i ask what size wood did you use? 4"? Thank you.