I was provided product by DecoArt and compensated to write about this project, but all thoughts, opinions, and ideas are my own :)
We decided to clean out and organize the garage a few weeks ago, but did nothing to the step outside the garage door. It just remained a mess; a place where old shoes went to die and were forever forgotten. It has literally looked like this, even worse, for like six years.
In my perfect house, I would have a huge mudroom. Currently, our mudroom is really our laundry room and it gets MESSY. Like, complete embarrassment, clothes hanging everywhere, towels on the floor, jackets and bags thrown about, can't even open the doors mess. It's bad. So, I had a few thoughts on how to remedy this. Move the laundry room to the dungeon of a basement. Get stackables, and put a little mudroom on the side of it, or put something in the garage. The obvious and easiest solution was putting something in the garage.
So I created this cute little hall tree. It's the perfect size for the space, and those hangers can hold a mad amount of jackets and bags.
Here's how I made it.
Cut list:
(2) 1x12, cut at 27"
(2) 1x12, cut at 14.5"
(1) 1x12, cut at 12.25"
(all you need is one 8' 1x12 for these cuts. Have the people at the wood center cut them for you)
(4) 1x2, cut at 18"
(4) 1x2, cut at 25.5"
(5) 1x6, 6" length
(1) 1x3, cut at 27.5"
(1) 1x6, cut at 27.5"
(2) 1x2, cut at
Supplies:
Hooks (mine are from Hobby Lobby)
Frames
Wood glue
2" finishing nails and/or screws
1 1/4" finishing nails
DecoArt Satin Enamels Paint in Pure White, 2 jars
DecoArt Satin Enamels Paint in Grey Taupe, 1 jar
Here's how to did it.
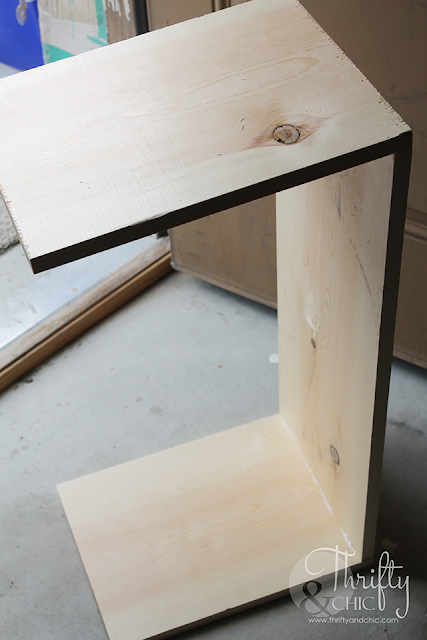
Attach the two 14.5" sides to one of the 27" pieces using wood glue and 2" nails. Use screws for added support for heavy use.
Add the second 27" piece to the bottom, 3/4" up.
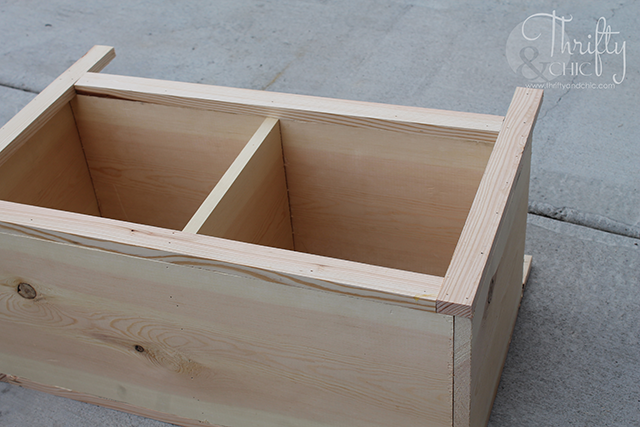
Now mark the center of the 27" pieces and secure the 12.25" piece right in the middle.
Attach the the 18" 1x2 pieces to the sides. Keep the top and outside edge flush. I used 2" nails for this piece also.
Next add the 25.5" 1x2 pieces to the top and bottom. Both flush with the top portion that you are attaching it to. I just used 1 1/4" nails and glue for this.
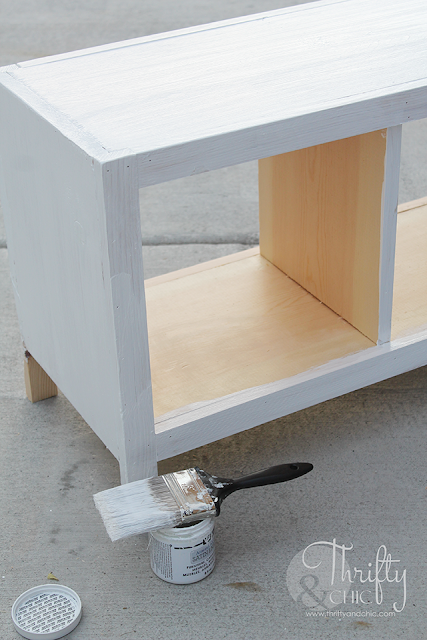
Next I sanded it down.
I then painted all the outside pieces and trim with DecoArt's Satin Enamels Pure White. This took two coats.
I carefully painted inside the cubbies with DecoArt's Stin Enamels Grey Taupe.
Next was adding the top piece of the hall tree. I just screwed these directly into the wall with 2" screws.
After painting the 1x6's DecoArt's Pure White, I then painted the trim pieces Grey Taupe. I attached the 1x3 to the top of 1x6s with 2" nails. I then measured 8.5" down and attached the 1x6 cut at 27.5"
I added the 1x2's to the side in between the 1x3 and 1x6.
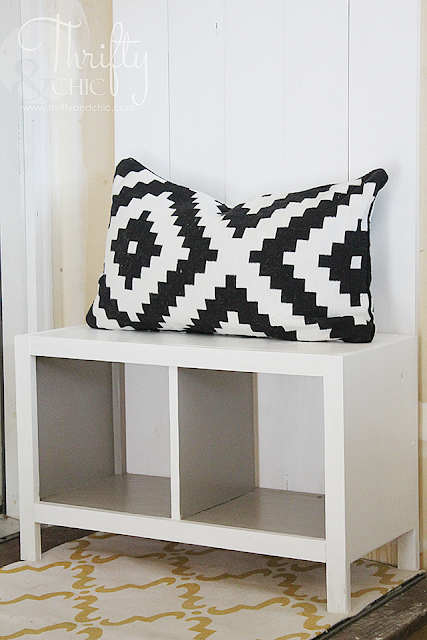
Next was just putting the bench up to it :) It's almost done!
For the hooks, I measured 5" in on each side, and then 14.75cm in between each one to get the 4. I drilled the holes first to make sure I didn't split the wood with the 2" screws. I then screwed the hooks in. Two of these hit studs which was great! I didn't secure the 1x6 in the earlier step because I new I would be screwing these hooks in with 2" screws here. This will help with stability when I have a mountain load of jackets hanging on these during the winter.
To hang the frames, I hammered a nail into the top of the wood, following the same measurements as the hooks. I then hot glued some jute onto a frame and hung it.
I am so happy how this turned out! I just wished my garage had finished and painted walls so you can really tell how great it is! :)
These cubbies are just awesome. I'll probably find some cute wire baskets for them to put some shoes or cold weather gear in them.
The hand prints correspond to whose hook is whose. A little cuter than just names :)
It's weird to have something cute in the garage lol. But, I gotta say, it's super nice walking out to get into the car and having this to look at on the way out! Much better than tripping over a mound of dirty filthy shoes. Plus, enamels are awesome and so easy to clean since this is sure to get dirty pretty quick :)
For more inspiration, check out DecorArt's website and social pages!
www.decoart.com
Disclosure of Material Connection: This is a “sponsored post.” The company who sponsored it compensated me via a cash payment, gift, or something else of value to write it. Regardless, I only recommend products or services I use personally and believe will be good for my readers. I am disclosing this in accordance with the Federal Trade Commission’s 16 CFR, Part 255: “Guides Concerning the Use of Endorsements and Testimonials in Advertising.”


You have done very intersting and purposeful with that plain wall. You are brillaintly used your imagination and brains. That storage space is looking amazing and beautiful color scheme. Great work.
ReplyDeleteThis is fabulous!!! Love it!!
ReplyDelete