I'm a coffee lover, therefor I have quite a few coffee mugs :) I have my cabinet full enough that my plates hardly fit in there. I did get rid of a few mugs last year, but then I bought more. So, I decided I needed another spot for my mugs. But! This time I wanted to display them. I have been eyeing some metal wall mount cup racks for awhile now, but can't justify there $80+ price tag. I was seriously like sooo close to buying one, when my DIY bone started hurting and got me thinking. I could totally make one! Duh :) It's not metal; it's wood. But I still love it and saved myself a little $$...well, a lot of $$$$.
You can make this any size you want, I made mine a little smaller than I wanted, but I needed it to fit on a certain wall, so I had to adjust the dimensions. Here's the size I used, but once again, you can adjust it to be wider and taller.
Supplies:
2- 1x2s @ 30"
5- 1x1s @ 12" (found in the molding aisle)
20- 1/4" dowels @ 3"
10 corner brackets
Drill and 1/4" drill bit
Wood glue
Paint
2 D-rings for hanging
Step 1: Cut the wood the length you need. My complete project was 30" high by 15" wide. So, my 1x2s are cut at 30" and my 1x1s are at 12".
Step 2: After playing around with the measurements, I ultimately decided that each cup needs about 7" to dangle. So, I marked approximately 7" on each 1x2. The measurements didn't quite make it an exact 7 on each one, I just made sure to mark the same places on both 1x2s to make sure they lined up.
Step 3: Then I marked the spots for the holes on the 1x1s. They are 3.75" from each end with 4.5 in between. I also marked the holes on the connecting 1x2s since I placed dowels on the actual 1x2s too. So, when you place the two pieces together, all the dowels should be 4.5" apart.
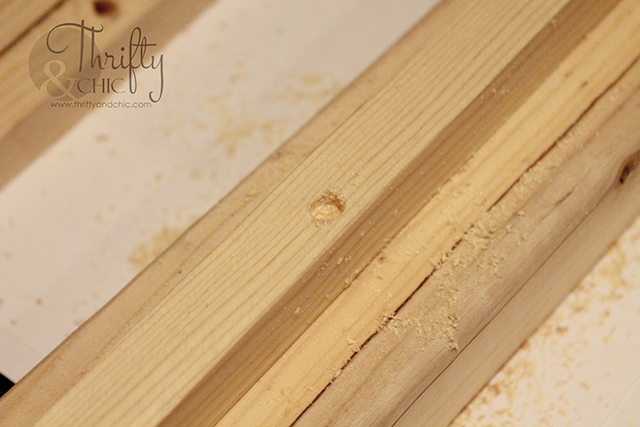
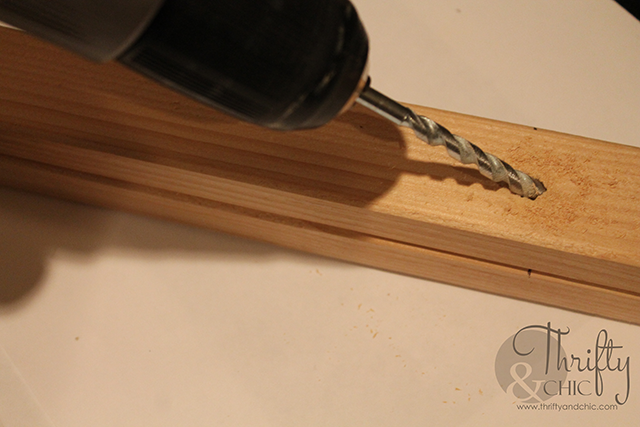
Step 4: As for drilling holes for the dowels. I was going to use my drill press, but decided to hand do it since most people don't have drill presses. I wanted to see if it would work, and it did! Not every hole is perfect, but that's alright with me. So, for the 1x1 pieces, I started each hole on a mark with the drill bit straight up, close to the edge but not on the edge. I then pre-drilled a hole about 1 cm down. I then angled the drill about 45 degrees and drilled until I felt it give a little bit. This happens when you are about to drill out the bottom, which you don't want to do. So, to clarify a little bit, the first pre-drilled hole is going to be the top of the piece where to dowel is going to stick out of the wood, so drill the angle down through the thickest portion of the wood
I then did it the same thing on each mark, in the middle of the 1x2.
Here are all my holes drilled on the 1x2s, all going in the same upward direction.
Step 5: Connect the pieces. I tried two other ways to do this before ultimately deciding to do it this way. If you don't do the holes on the 1x2s, then you can pocket hole the 1x1s into the 1x2s, or glue and nail a 2.5" nail into the 1x2 thru the 1x1. But, since there are holes there now doing it this way, I had to do something from the back and not side. I used these corner 90 degree brackets on each joint and glue to join the pieces.
If you want to hang this, this is where you will also want to secure your d-rings onto each 1x2. I chose to do mine about 8" down.
Step 5: Add the dowels. I placed a drop of glue into each hole and then added the dowels as far as they could go in. You can use a hammer here also to make sure they are in. This is where you mugs will hang, so make sure they are secure!
Step 6: Sand and paint, or stain. I just used a black enamel on mine to give it that metal type look.
I love how this turned out! Although you could possible use each dowel to hang a cup, I didn't. You'll have to test it out and make sure the integrity of your rack is up to par :) I like the look of it being a little sparse. Although this is just for pictures, I do have 8 cups hanging on mine currently, two on each row.
You can barely tell that the dowel holes were just eyed. Some are a little off, but that doesn't bug me.
Here it is on the wall hanging by the d-rings. When you secure this to the wall, make sure you use screws into studs for stability.
Disclaimer: As with all projects on my site, make this at your own risk. I have made mine, and love it! When using power tools, follow all safety precautions and use your equipment as designed. My cups have yet to fall from the wall and break, but that doesn't mean yours won't, so please be sure to make sure the integrity of your piece meets the weight that you put on it!


Wow! Super cool display and beats the $80+ ones I have seen online. :) Thank you for all the great details. I gotta get busy!
ReplyDelete~ Christina in FL
I love this idea, especially if you have a matching set of mugs. I can imagine this being adorable in a guest house, butlers pantry, a college dorm, or an apartment. A great way to save some space, while still decorating. Thanks for sharing!
ReplyDeleteBeautifully done. Great usage of the space above the television. These shelves are also enhancing the beauty of home decoration. It’s simply amazing.
ReplyDeleteLove This! I live in Canada and the magnolia market ones don't ship to Canada. This is a great, MUCH CHEAPER alternative. Thanks! Will be making one soon!
ReplyDeleteGreat idea, I was looking for a way to store stemless wine glasses, I think this will work. Thanks for the tutorial!
ReplyDeleteI L💚💚VE THIS!!!! And it sure does beat that hefty price tag of the metal. AND it looks like the metal one! I am definitely going to make one of these! Awesome idea!
ReplyDelete