I've learned over the years how important it is to have multifunctional furniture. Our house was built with little in the way of storage. The only closets that exist are in the bedrooms. No coat closet, linen closet, storage closet or pantry for that matter. I'm not complaining...well, maybe just a little. Let's just say I now know what to look for in our next house. Because of this lack of storage, I've realized how important it is to have furniture that doubles as storage. My old sofa table was the exact opposite. It was just a normal sofa table, with just two small drawers. I ended up adding some small storage pieces underneath it, but that area got messy real quick; like minutes after I cleaned it quick. This was the area for my kids coloring books, crayons, paints, etc. This picture below is what it pretty much looked like every day...if not worse.
Enough was enough, and I finally decided to do something about the mess issue. They obviously used the stuff, so I couldn't just get rid of it. I just needed a better way to hide it. So...I bought this beaut of a dresser. It was the perfect height and width. It had all the beautiful details I wanted. I actually didn't mind that it was wood, and kept it looking like this for a couple of months. The wood on wood floor started to get to me, and the fact that it didn't match the other wood cabinet on the wall next too it drove me crazy.
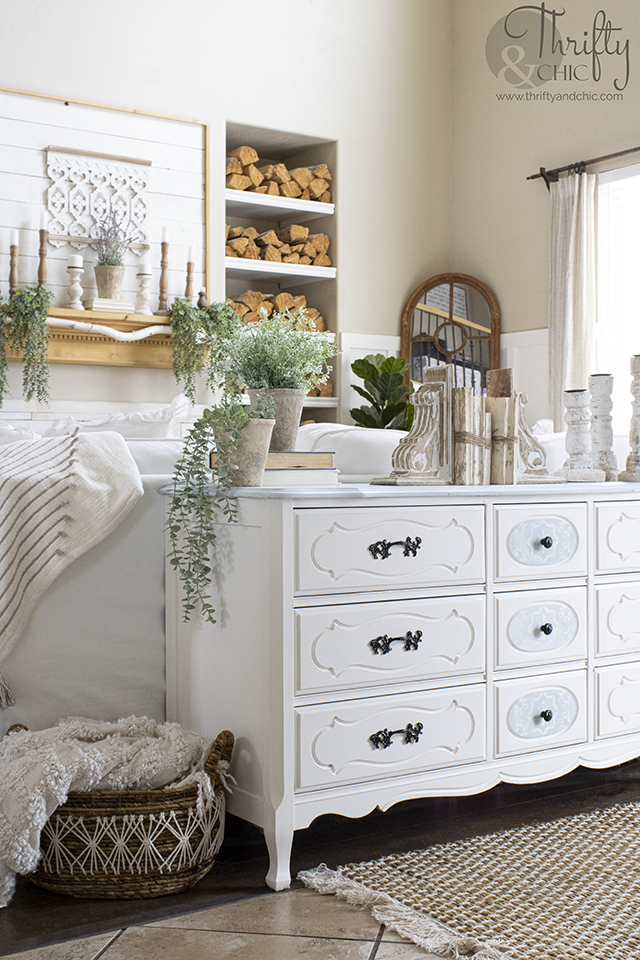
So....I decided to paint it! Here's the end result, and I'll show you how I painted this dresser with my favorite chalk paint from DecoArt. I love chalk paint since no sanding is required, and it has great coverage and adheres to even the slickest of surfaces. It's definitely a time saver!
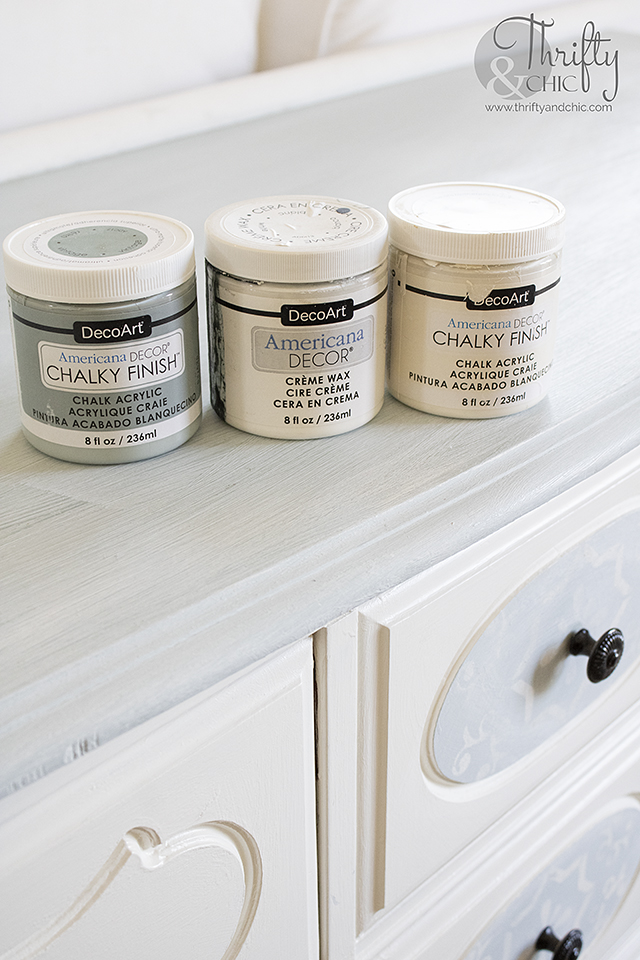
The paint/colors I used: Step 1: This isn't a necessary step with chalk paint (which is why I love it so much), but the top and some of the edges of the dresser were pretty banged up. So, I decided to smooth them out a little bit with some sandpaper.
Step 2: Remove the hardware. I made it easy on myself and didn't remove the drawers. These drawers are loaded full of stuff, so I didn't want to go through that mess. If the dresser is empty, it would be a good idea to take out the drawers for the next steps.
Step 3: There are brushes specifically designed to use for chalk paints, but I just use my normal ol' paint brushes without a problem. I painted the drawers and the sides of the dresser with the Chalky Finish in Lace. I initially didn't paint the inlays with the Lace, but you can see what happened in the following steps. One coat has wonderful coverage, but I like to do two and sometimes three. This wood was pretty dark, so it needed that extra third coat. The chalk paint dries really quickly, another plus! I was able to paint this whole dresser in one night which was helped by not having to wait as long in between coats.
I then carefully painted the inlays with the Chalky Finish in Vintage. This took a little bit of time to do; you can see my process in the video below.
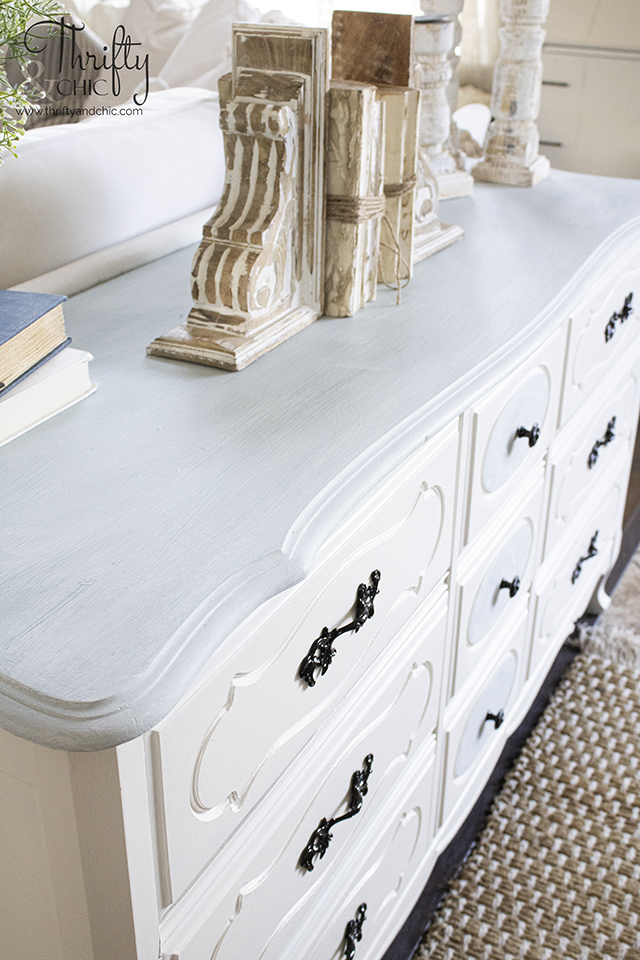
Step 4: I painted the top with just two coats of the Chalky Finish in Vintage. Yes, this is the same color as the top! Crazy what the lighting can do. I would say that this color below, is the true color during the day, and the color above is closer to the color at night.
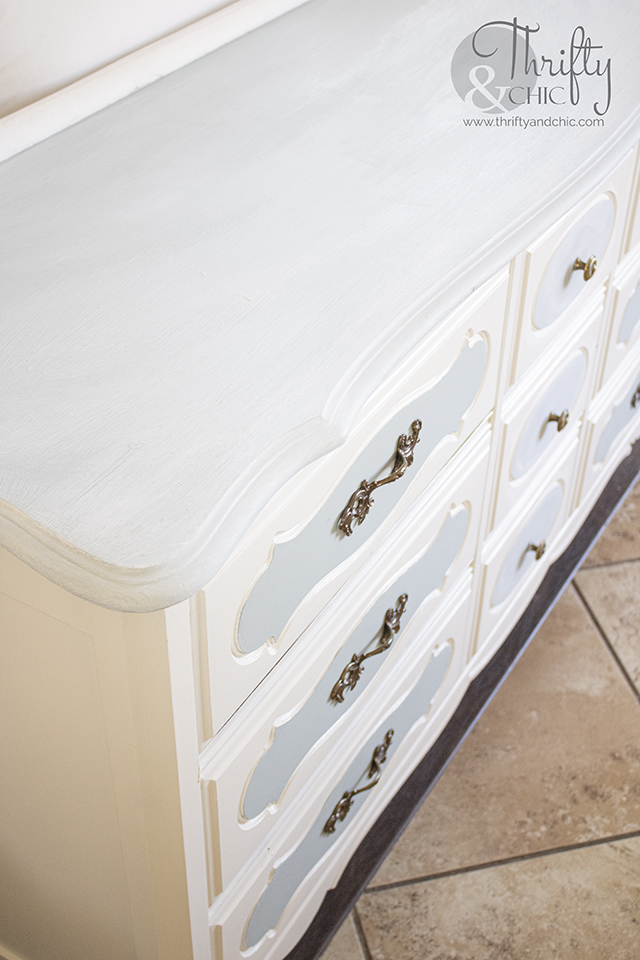
Step 5: Add a coat of the Creme Wax in White. I made sure to add it over the entire dresser. They also make brushes for this that will give it a smoother look. I didn't have one on hand, so once again I just used my normal paint brush. I love the look it created when added to the Vintage chalk paint. It dries clearer than it goes on, but still shows some white. Adding a little more into the crevices will get that really pretty white wax look.
You can see below how it softened the top up quite a bit...adding a little more vintage look to it.
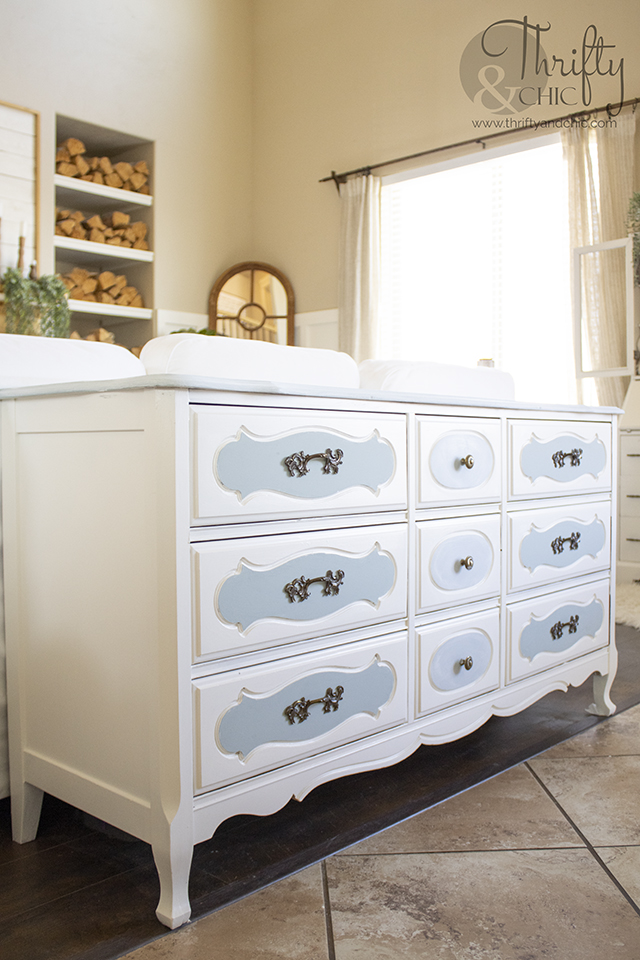
This was my initial vision for the dresser...and my vision didn't quite transfer to reality. I wasn't a fan of how this ended up looking. It was too much blue for me. I almost went back to the drawing board, thinking about stripping the paint, changing colors, etc. Then I woke up the next morning and decided to salvage the look.
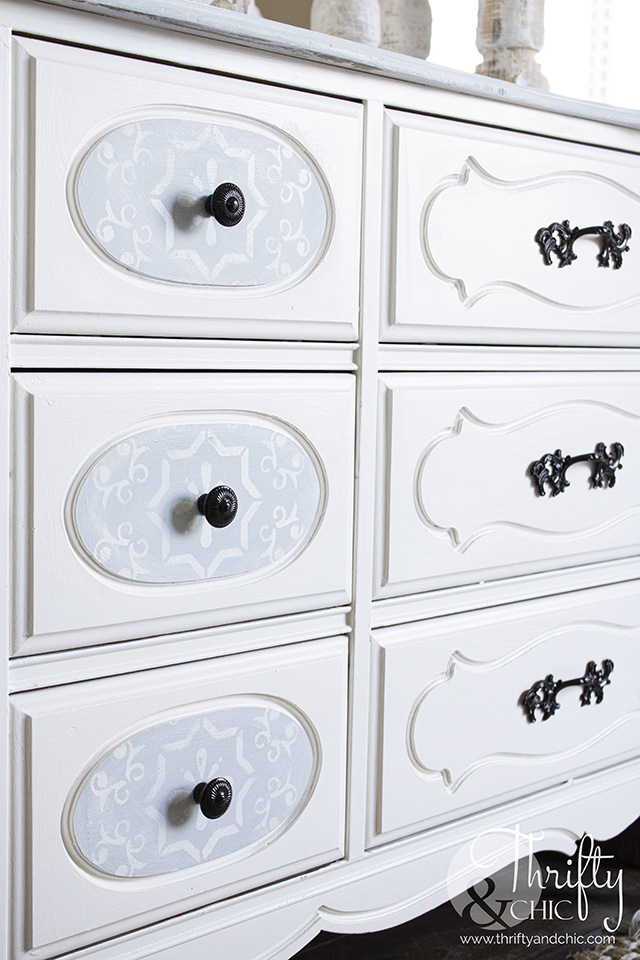
Step 6: I decided to stencil the middle drawers. I used the Mediterranean Tile stencil from AmericanaDecor. I used the dry brush method with a stenciling brush and the Chalky Finish in Lace. The dry brush method is simply slightly dipping the brush into the paint, and then blotting off the excess paint onto a paper towel. The brush then has paint on it, just not a gloppy amount. I then used the brush with the stencil to get a softer look.
Here's how the stencil looked with the white wax.
Step 8: Put the knobs back on! I ended up spray painting the pulls and knobs black. This updated the dresser even more.
Here's the complete look of the top again. I can't wait to use this white Creme Wax on some black chalk paint! I bet it'll look amazing.
And for the full dresser with the updated colors.
This dresser turned sofa table is so nice to have now! It hides allllll the stuff and looks pretty too! I was able to put all the homeschool items in here also. It's definitely a multi-purpose piece! It's been so nice hiding the mess. We eat dinner to the right of this area, and eating and staring at that mess was getting old! ha! Now I finally have something pretty to look at :)
Step 2: Remove the hardware. I made it easy on myself and didn't remove the drawers. These drawers are loaded full of stuff, so I didn't want to go through that mess. If the dresser is empty, it would be a good idea to take out the drawers for the next steps.
Step 3: There are brushes specifically designed to use for chalk paints, but I just use my normal ol' paint brushes without a problem. I painted the drawers and the sides of the dresser with the Chalky Finish in Lace. I initially didn't paint the inlays with the Lace, but you can see what happened in the following steps. One coat has wonderful coverage, but I like to do two and sometimes three. This wood was pretty dark, so it needed that extra third coat. The chalk paint dries really quickly, another plus! I was able to paint this whole dresser in one night which was helped by not having to wait as long in between coats.
I then carefully painted the inlays with the Chalky Finish in Vintage. This took a little bit of time to do; you can see my process in the video below.
Step 5: Add a coat of the Creme Wax in White. I made sure to add it over the entire dresser. They also make brushes for this that will give it a smoother look. I didn't have one on hand, so once again I just used my normal paint brush. I love the look it created when added to the Vintage chalk paint. It dries clearer than it goes on, but still shows some white. Adding a little more into the crevices will get that really pretty white wax look.
You can see below how it softened the top up quite a bit...adding a little more vintage look to it.
This was my initial vision for the dresser...and my vision didn't quite transfer to reality. I wasn't a fan of how this ended up looking. It was too much blue for me. I almost went back to the drawing board, thinking about stripping the paint, changing colors, etc. Then I woke up the next morning and decided to salvage the look.
Step 6: I decided to stencil the middle drawers. I used the Mediterranean Tile stencil from AmericanaDecor. I used the dry brush method with a stenciling brush and the Chalky Finish in Lace. The dry brush method is simply slightly dipping the brush into the paint, and then blotting off the excess paint onto a paper towel. The brush then has paint on it, just not a gloppy amount. I then used the brush with the stencil to get a softer look.
Here's how the stencil looked with the white wax.
To also update the look and try to salvage this paint job, I went back over the side drawers with the Lace. That left only the middle drawers and the top with the Vintage.
Here's the complete look of the top again. I can't wait to use this white Creme Wax on some black chalk paint! I bet it'll look amazing.
And for the full dresser with the updated colors.
This dresser turned sofa table is so nice to have now! It hides allllll the stuff and looks pretty too! I was able to put all the homeschool items in here also. It's definitely a multi-purpose piece! It's been so nice hiding the mess. We eat dinner to the right of this area, and eating and staring at that mess was getting old! ha! Now I finally have something pretty to look at :)
Want more inspiration like this from DecoArt and other amazing bloggers? Follow here!
www.decoart.com
Facebook
Instagram
Pinterest
www.decoart.com
PIN FOR LATER:
Disclosure of Material Connection: I received one or more of the products or services mentioned above for free in the hope that I would mention it on my blog. Regardless, I only recommend products or services I use personally and believe will be good for my readers. I am disclosing this in accordance with the Federal Trade Commission’s 16 CFR, Part 255: “Guides Concerning the Use of Endorsements and Testimonials in Advertising.” Disclosure of Material Connection: This is a “sponsored post.” The company who sponsored it compensated me via a cash payment, gift, or something else of value to write it. Regardless, I only recommend products or services I use personally and believe will be good for my readers. I am disclosing this in accordance with the Federal Trade Commission’s 16 CFR, Part 255: “Guides Concerning the Use of Endorsements and Testimonials in Advertising.”








Your dresser turned out gorgeous; love the toned down look of the "lace" paint on the center insets. Just the right amount! Pinned!
ReplyDeleteAmazing! May I ask you how do you clean the dresser once it's painted? With water and soap?
ReplyDelete