This post contains affiliate links
Well, it's been a long time coming since I actually...somewhat...kind of...liked my kitchen :) If you have followed along with me throughout the years, you may notice I don't share this space much, and when I do, I'm always saying the same thing. I want to change, my husband has put his foot down on doing anything in here...yadda yadda yadda. Well, I got away with doing the island while he was gone for a weekend a few years back, and now I decided to do something again :)
I added a brick backsplash! Well, technically, not real brick. My husband and I have yet to ever come to an agreement on backsplash. So, our walls have sat bare since we moved in. I have shown him countless types, sizes, shapes, etc of backsplash and he doesn't like any of them. So...one day, he said that he may be okay with brick. I took that and ran with it...well ran far enough where I didn't have to commit. You know, just in case he made me take it down. So, here's the before of this wall....bare bones.
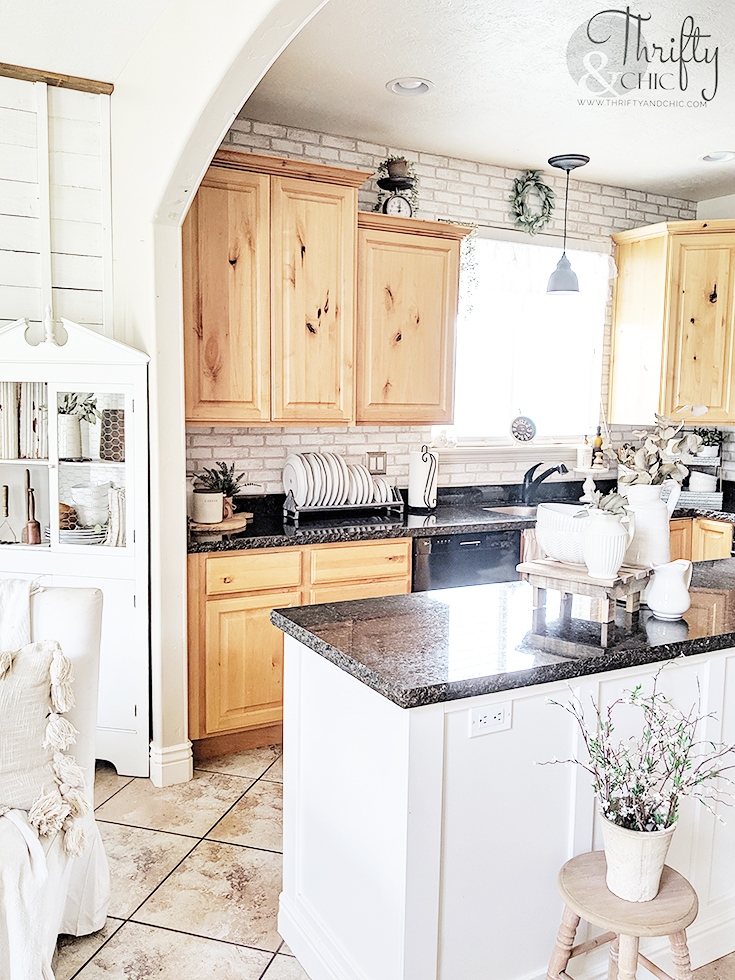
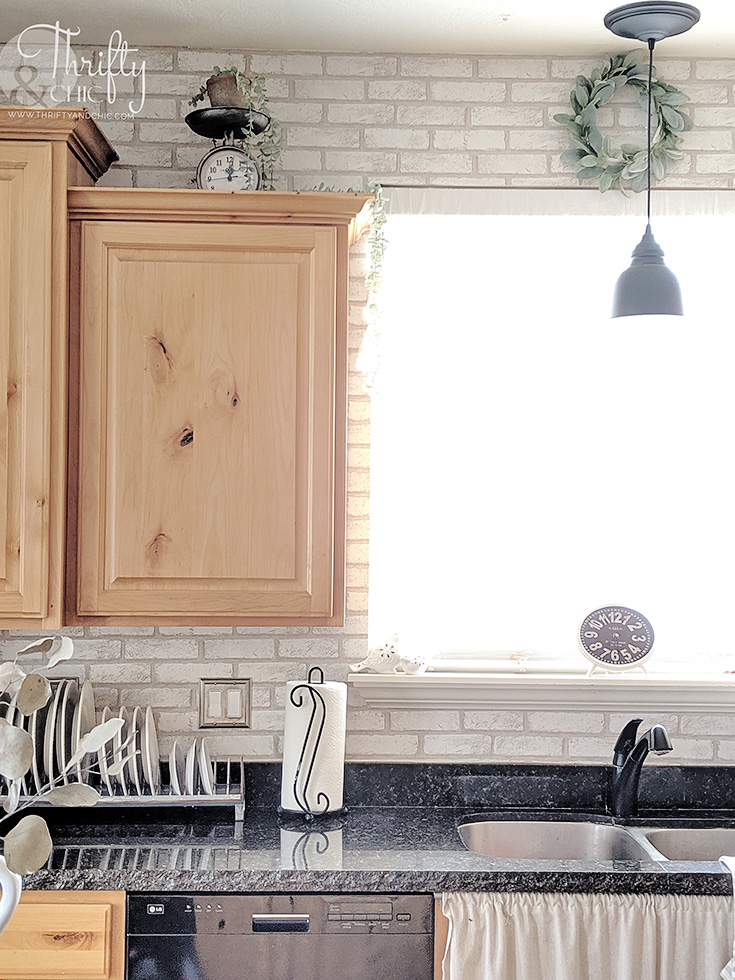
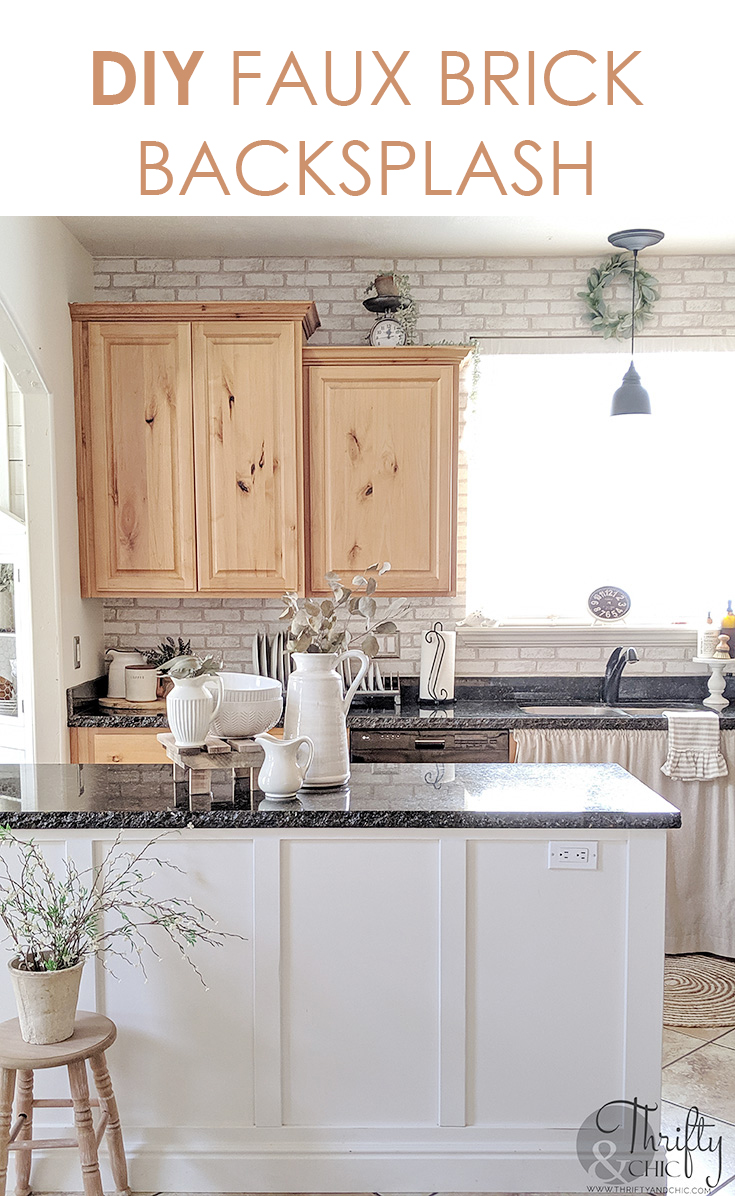
And the after!
Can light Pendant Light: Link Ruffle Valance: Link Metal Plate Rack: Link Two-tiered Metal Tray: Link Brick Peel and Stick Wallpaper: link
Here's how I achieved this completely non-committal look :) With this amazing brick peel and stick backsplash:
One dreary day while my dad was visiting and keeping my kids busy, I decided that it would be a perfect time to try this and to get his opinion before I showed it off to my ever critiquing husband.
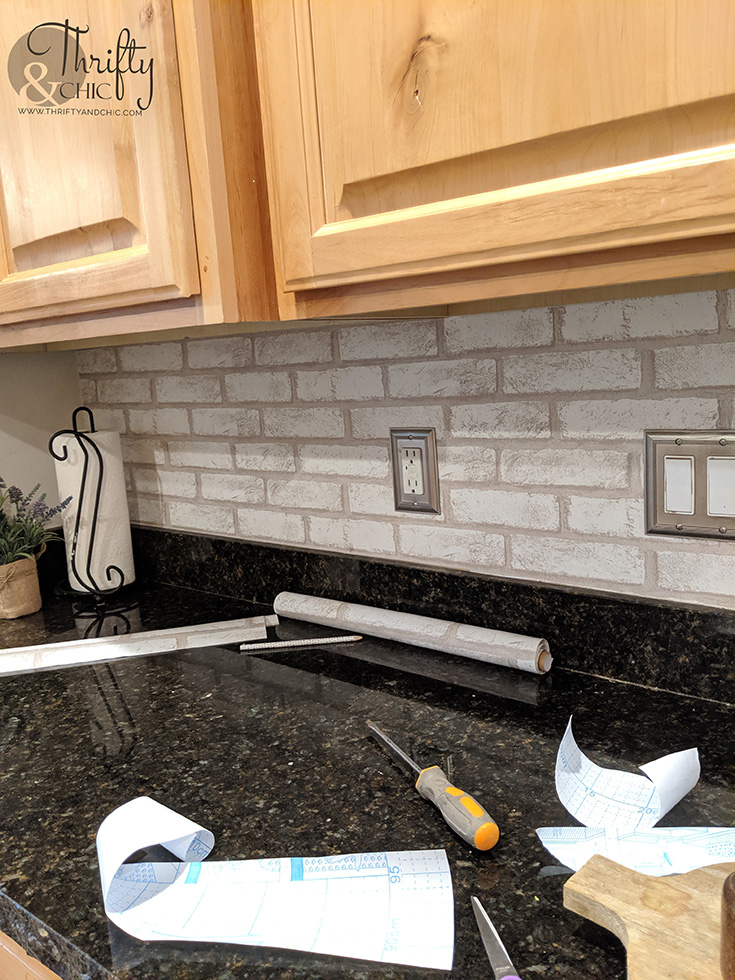
My first step was to prep the wall making sure it was super clean. I then went over it with some rubbing alcohol. For the brick peel and stick wallpaper, I started with the smaller section of my kitchen and worked from left to right under the cabinets. It was super easy to line up which is saying something compared to other wallpapers I have used. When I came across an outlet, I measured how far in and up I needed a hole and what size hole. I then cut it out and placed the peel and stick wallpaper right over it.
It may not look pretty underneath, but when the plate is back on the outlet, you can't even tell. Plus, the plate gives you a little allowance on messing up.
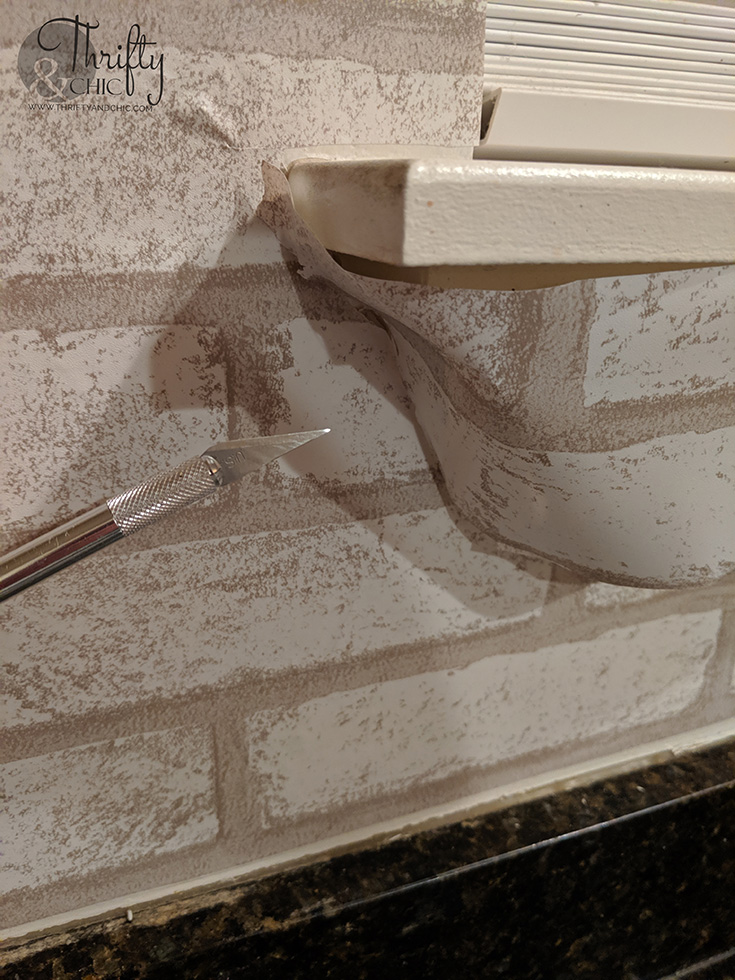
The trickiest part of this whole deal was working around the window ledge. I didn't want to remove it, so I worked around it, cutting the wallpaper where needed to give me some slack to secure it around the curves. I then used an exacto knife and gently pushed around the molding curve cutting into the wallpaper. I then removed the excess.
I did a similar thing underneath the cabinets. If I had excess that went above the under the cabinet line, I used the knife, and cut along the cabinet line where the wallpaper would need to go upwards. In this picture, I had to deal with that and the molding with one single piece.
The rest of of the process was just lining it up correctly, and smoothing out the bumps. I did this with a credit card, and made sure to go over the seams.
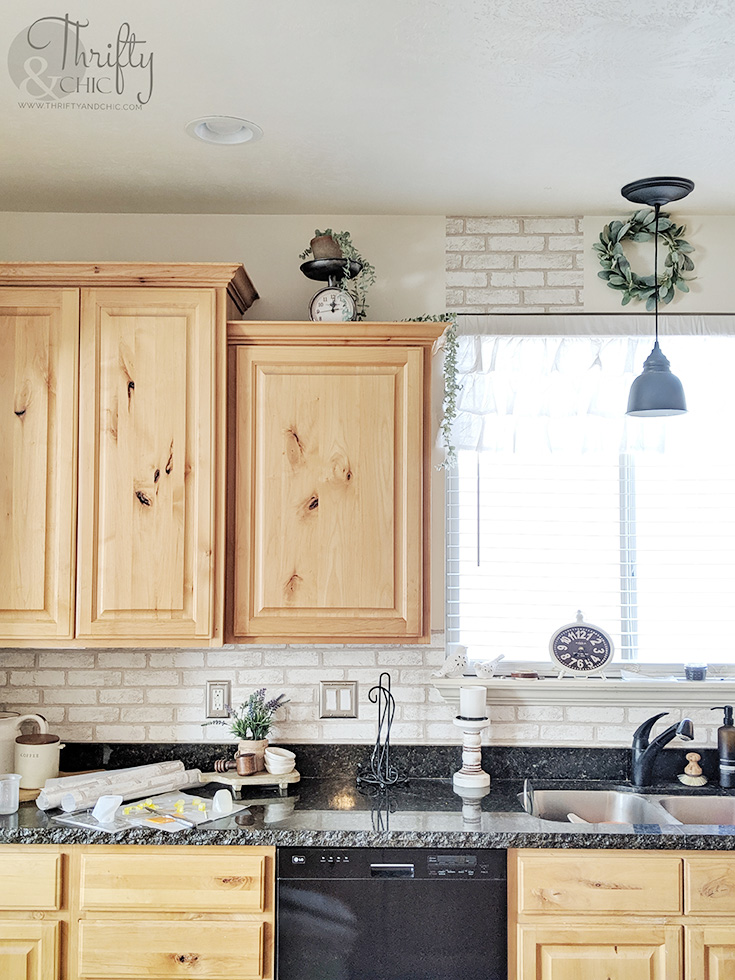
I then decided that I wanted to do the whole wall, not just the backsplash. So, I put a piece up high to see if it was a good idea, and I loved it!
The longest process of this was finding all the smaller brick sections on the sides of the window that would line up perfectly. At that point, I was just using scrap pieces so I was lucky to have the right amount to go all the way up!
Here's the finished area in daylight.
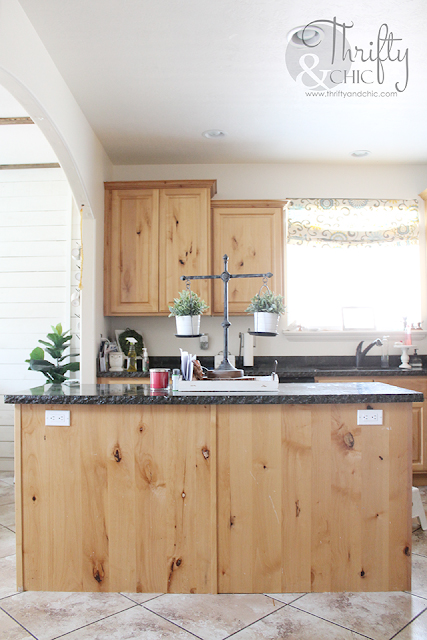
Here's another before:
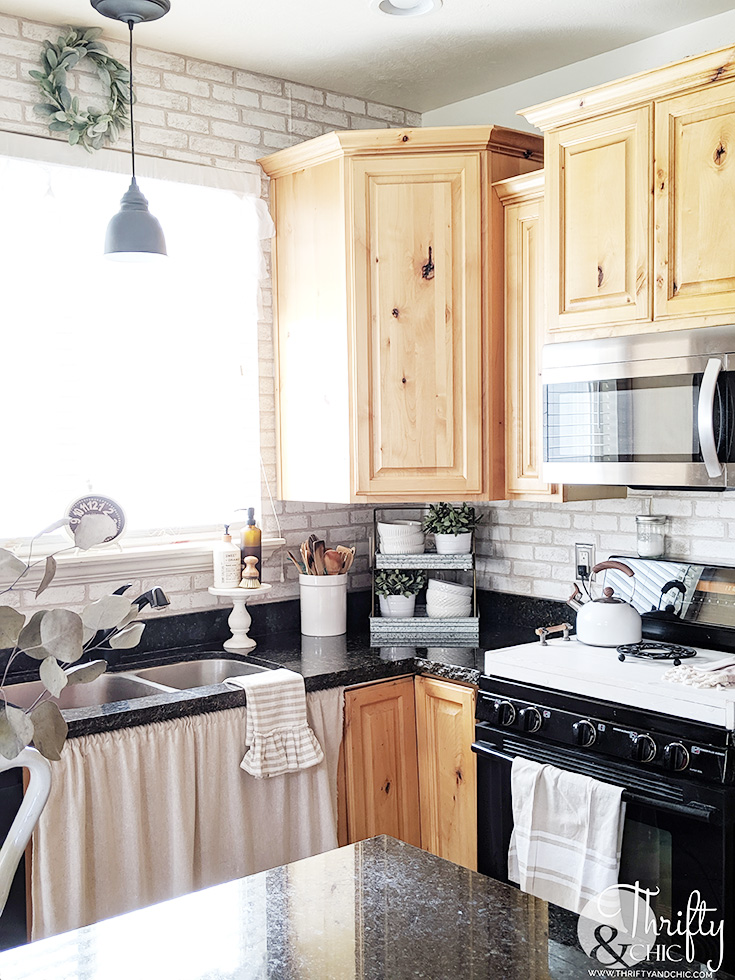
And then the faux brick backsplash all the way to the top. At this point, is it just a brick wall, or a backsplash? I don't know :) I also changed out some decor on my counter to go with the new look. I actually found this plate rack months ago and was waiting to use it when I put floating shelves in here.... yep, that's my next big project. These cabinets, or at least the one to the right, is coming down! At that point, I really need to decide on a more permanent solution to the wall.
But until then! I'll just enjoy it.
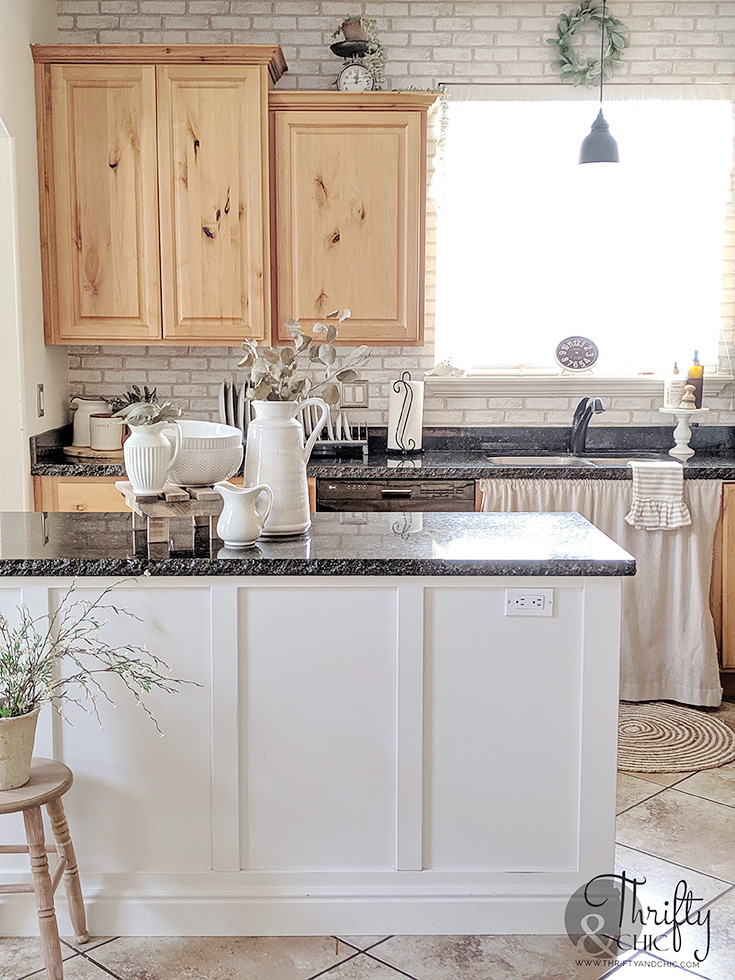
When this space is clean, and when it's daylight, I actually don't mind my kitchen at all. Compared to what it looked like when I moved it, it's a big difference!
And after again.
I'm getting closer and closer to a kitchen that I love. Next is to fix the janky cabinets...maybe replace the countertops, and definitely add a floating shelf :)
The trickiest part of this whole deal was working around the window ledge. I didn't want to remove it, so I worked around it, cutting the wallpaper where needed to give me some slack to secure it around the curves. I then used an exacto knife and gently pushed around the molding curve cutting into the wallpaper. I then removed the excess.
I did a similar thing underneath the cabinets. If I had excess that went above the under the cabinet line, I used the knife, and cut along the cabinet line where the wallpaper would need to go upwards. In this picture, I had to deal with that and the molding with one single piece.
The rest of of the process was just lining it up correctly, and smoothing out the bumps. I did this with a credit card, and made sure to go over the seams.
I then decided that I wanted to do the whole wall, not just the backsplash. So, I put a piece up high to see if it was a good idea, and I loved it!
The longest process of this was finding all the smaller brick sections on the sides of the window that would line up perfectly. At that point, I was just using scrap pieces so I was lucky to have the right amount to go all the way up!
Here's the finished area in daylight.
Here's another before:
And then the faux brick backsplash all the way to the top. At this point, is it just a brick wall, or a backsplash? I don't know :) I also changed out some decor on my counter to go with the new look. I actually found this plate rack months ago and was waiting to use it when I put floating shelves in here.... yep, that's my next big project. These cabinets, or at least the one to the right, is coming down! At that point, I really need to decide on a more permanent solution to the wall.
When this space is clean, and when it's daylight, I actually don't mind my kitchen at all. Compared to what it looked like when I moved it, it's a big difference!
Can light Pendant Light: Link Ruffle Valance: Link Metal Plate Rack: Link Two-tiered Metal Tray: Link Brick Peel and Stick Wallpaper: link
The walls in here used to be beige, the cabinets all wood, the tile has it's own orange-ish/pink hue. It looked like an orangesicle in here...for reals! Painting the walls white helped a bit, here's a picture before I did the island:
I'm getting closer and closer to a kitchen that I love. Next is to fix the janky cabinets...maybe replace the countertops, and definitely add a floating shelf :)
Can you believe this update cost me under $20??? Seriously! It was well worth it....my husband of course hates it. But, he hated the island too and it's still there. At this point, I do things for me and to make me happy :)
It took me about three of the 17.7"x118" rolls to finish this space.
Get your brick peel and stick wallpaper here along with other items shown:
Pin for later:
Disclosure of Material Connection: Some of the links in the post above are “affiliate links.” This means if you click on the link and purchase the item, I will receive an affiliate commission. Regardless, I only recommend products or services I use personally and believe will add value to my readers. I am disclosing this in accordance with the Federal Trade Commission’s 16 CFR, Part 255: “Guides Concerning the Use of Endorsements and Testimonials in Advertising.”














0 comments